Continuing on from the last three posts in this series (sketching, swatching, and measuring), today we’re going to talk a little bit about the construction and the start of the knitting. Honestly, this part may be kind of boring, but it’s still a part of the process, so we’re going to talk about it briefly.
In the last post, I touched briefly on the construction of the sweaterdress. Originally some people had thought that I’d be working from the top down. If I wanted a totally seamless construction, I probably would have. But it’s important to think about the shape of the finished piece along with the yarn that you’re using in the design.
I knew I wanted a wool, as I’m imagining this as a fall-winter piece, and I wanted a piece that would be good for layering, but also good for that transition period. I also wanted a pretty sturdy construction, with some bounce but not stiff. (If you feel like you’re not familiar with the kinds of yarn and the effect that plies can have on fibers, I cannot recommend Clara Parkes’ Knitter’s Book of Yarn enough.)
I did not want the wool to get saggy, as I thought it would if I knit this dress all in one piece. Therefore, it made the most sense to me to work this in two main pieces: the upper body and the skirt. With the upper body, I could have worked from the top down or bottom up, but I like the idea of decreasing and working fewer stitches towards the end of a piece, so I chose to go from the top up. In a stockinette stitch garment such as this, bottom up or top down is totally a matter of personal preference; if I had been working with a lace stitch or colorwork pattern, one construction style may have worked out better than the other.
When working a bottom up sweater, I highly recommend working the sleeves first. This is a great time to check your gauge again without knitting the entire body of a sweater, and it just feels like a better starting off point. I knit mine two at a time, and took absolutely no process photos of this; sorry. I also wanted the sleeves to have little notches, a detail that will be repeated at the bottom of the skirt and possibly in the collar (yeah, I’m still working that one out).
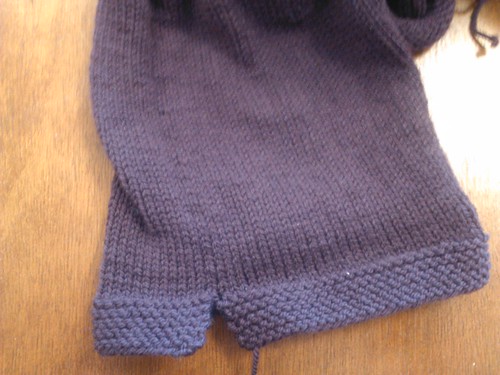
I swear, the yarn is all one color; my phone’s camera chose to read it as two colors, and no, I wasn’t running behind on getting photos of this today.
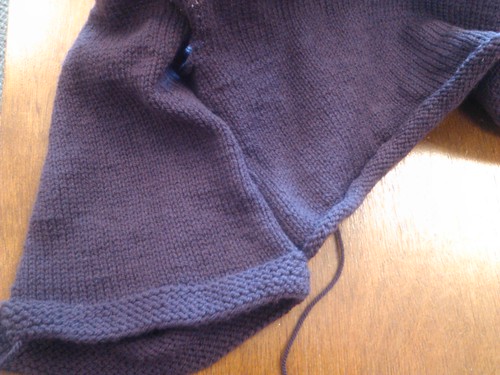
To work the notches, I just worked flat in garter stitch for a ten rows. On the next row, I joined the pieces in the round and knit until they measured about 8″ from the cast-on edge. Then I did something a little strange— I knit to almost half of the stitches, and then bound off for the armhole stitches (I bound off 12 stitches, as my gauge was at 11.5 stitches to 2″ this seemed like a good number, this left 68 stitches for each sleeve). I say “strange,” because typically when knitting sleeves, you’ll bind off stitches around the point where you join for working in the round. I did my armhole bindoff this way because the notches in garter stitch were at the join, but I want them to be facing out. In order to make sure they were on the outside of the sleeves, the armholes had to be on the inside.
This was another decision to make: Binding off the stitches is one way to set aside a space for the armhole, but I could have left the stitches on waste yarn, and either grafted the stitches with the body stitches, or worked a three-needle bind off with those stitches. Again, I wanted a firmer seam to provide a little more structure, so I opted for binding off. I’ll sew these stitches together with the bound off stitches from the body.
I then set aside the sleeves, and cast on the stitches for the body. I used a simple long-tail cast on, because I want a sturdy edge for that empire seam. Markers were placed at the beginning of the round and at the halfway point to indicate the exact sides of the body, and also where I would bind off armhole stitches. I knit for 6″, then worked to 6 stitches before the first marker, bound off 12 stitches, and repeated that for the other side, so I had 236 stitches. I started knitting the front of the body, and placed another marker in the exact middle of the front, to mark a new beginning of the round. As I came to each of the bound off sections, I started knitting the sleeves onto the body to make one piece of fabric with a total of 372 stitches.
With me still? Next time, I’m sorry to say, there’s more math involved.

Can’t wait to see more 🙂